How to Install a Flat Corner Brace Properly?
A flat corner brace looks simple: a small strip of metal, several screw holes, and two surfaces meeting at a right angle. Yet a poor fit can leave a joint loose, crooked, or weaker than expected. A proper installation starts with the material beneath the brace, not the drill. Check that the wood is sound, the corner sits square, and the brace spans both sides without rocking. Small details matter.
For this guide, installation specialist Alex Rios offers a practical reminder: “A brace is only as dependable as its fit, its fasteners, and the surface beneath it.” The steps ahead explain how to position a Flat Corner Brace, mark its holes, choose suitable screws, and tighten them without shifting the joint. You’ll also learn when pilot holes help and why screw length should match the material and manufacturer’s guidance. No single setup suits every project.
Expect a careful, hands-on process. Hold the brace in place, check the corner with a square, and mark each hole before drilling. Keep the brace flat against the surface. Stop if a screw spins, the wood splits, or the metal pulls away; those signs deserve a closer look. A rushed fit can seem fine at first. It may not stay that way. The right method depends on the joint, the substrate, and the load, so inspect your work before relying on it.
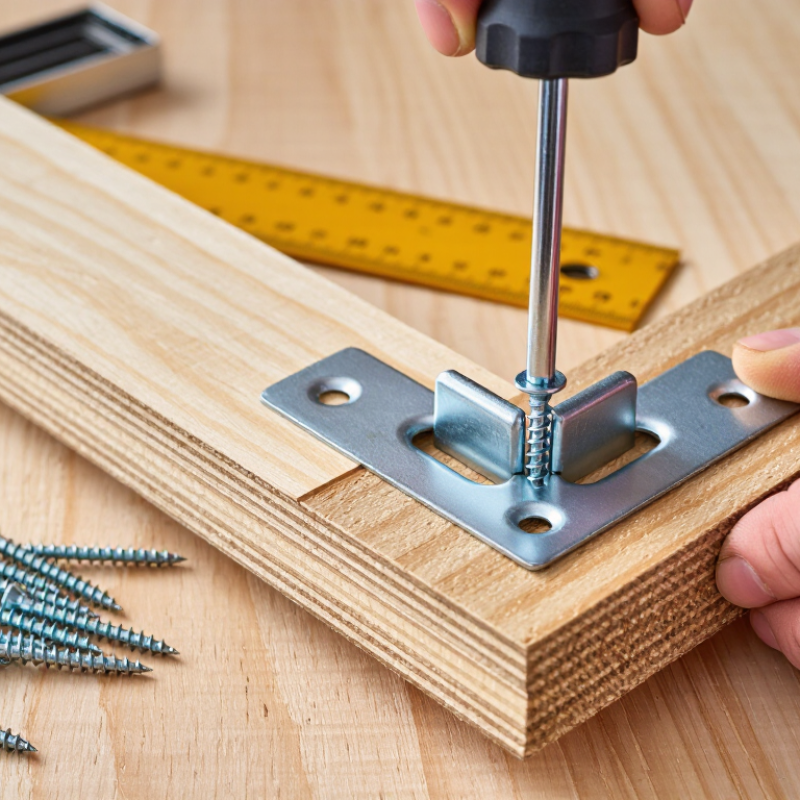
Identify the Flat Corner Brace and Confirm Joint Requirements
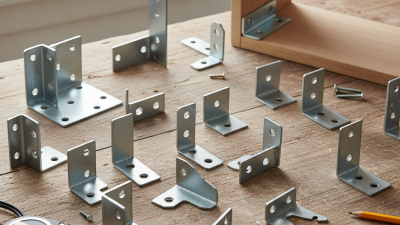
A flat corner brace is a flat metal plate with predrilled holes, designed to reinforce a joint where two members meet at roughly 90 degrees. Before selecting one, identify the joint: Is it a light-duty cabinet corner, a shelf, or a frame carrying substantial weight? Check the brace’s dimensions, thickness, hole pattern, and stated load rating against the members and expected forces. A snug visual fit is not proof of adequate capacity. Small details matter.
The American Wood Council’s 2024 National Design Specification explains that fastener capacity depends on factors including wood specific gravity, fastener diameter, penetration, and load direction. Confirm that the specified screws suit both the brace holes and the wood; short screws may miss the required embedment, while oversized heads may not seat properly. Also inspect the joint for splits, decay, and uneven contact.
I still pause over this step: a brace can pull a weak or misaligned joint tighter without making it sound.
Wood moisture deserves attention, too. The USDA Forest Products Laboratory’s Wood Handbook (2021) reports an average fiber saturation point near 30 percent moisture content; below it, moisture changes can cause wood to shrink or swell. If the members are damp or likely to dry, allow for movement and recheck fit. Not every corner is square.
For structural loads, use a connector and fastening schedule supported by engineering guidance, rather than relying on appearance alone.
Gather Tools and Prepare the Surfaces
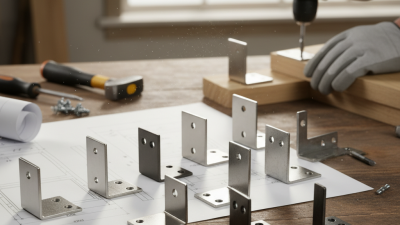
Before fitting a flat corner brace, gather a tape measure, pencil, square, drill, suitable bit, screws, and safety glasses. Keep a clamp nearby if the pieces shift easily. Check that each screw suits the material and is short enough not to break through the opposite face. Small detail, big consequence.
Set the parts on a stable, level work surface. Brush away dust and chips, then make sure the mating faces are dry and free of thick paint, splinters, or raised edges. If the corner rocks on the bench, correct that before marking anything. A brace cannot reliably pull uneven surfaces into alignment.
Position the brace across the corner and use a square to check that the edges meet at the intended angle. Mark the holes lightly with a pencil, then remove the brace and inspect the marks. They should sit far enough from the edges to reduce splitting, while still matching the brace holes. On hardwood or near an edge, drill pilot holes sized for the screws and material. A pencil line can look straight but still be off; rechecking takes seconds. Wear eye protection, and clear loose debris before drilling.
How to Install a Flat Corner Brace Properly? - Gather Tools and Prepare the Surfaces
| Step |
Tool or Material |
Preparation or Action |
Check Before Installation |
| 1 |
Flat corner brace |
Choose a brace that fits the joint and has mounting holes suitable for the intended fasteners. |
The brace sits flat across both joined surfaces without rocking or obstructing nearby parts. |
| 2 |
Measuring tape or ruler |
Measure the joint and mark the brace position so it spans both surfaces evenly. |
The brace is aligned with the corner and positioned clear of edges that could split or break. |
| 3 |
Pencil and square |
Mark the brace outline and, if needed, the center of each mounting hole. Use a square to check the corner alignment. |
Marks are visible, the brace is correctly oriented, and the joint is held in the intended position. |
| 4 |
Cleaning cloth and mild cleaner |
Remove dust, loose debris, grease, and moisture from the areas where the brace will sit. |
Both surfaces are clean and dry; no debris is trapped beneath the brace. |
| 5 |
Sandpaper, if needed |
Lightly smooth raised fibers or rough spots that prevent the brace from making full contact. |
The mating areas are reasonably flat. Avoid removing more material than necessary. |
| 6 |
Drill and suitable drill bit |
For wood or other materials that require pilot holes, select a bit appropriate for the fastener and follow the fastener maker’s guidance. |
Confirm the material and check for hidden wiring, pipes, or other obstructions before drilling. |
| 7 |
Screws or other compatible fasteners |
Select fasteners suited to the brace holes, base material, and expected load. Check that their length will not pass through the workpiece. |
Fasteners fit the holes and are compatible with the material; do not assume one size suits every installation. |
| 8 |
Screwdriver or drill-driver |
Use a bit that matches the fastener head. Set the tool to a controlled speed and avoid overtightening. |
The driver bit fits securely and the tool can be used without slipping or damaging the fastener head. |
| 9 |
Clamp, if needed |
Hold the joined pieces in their intended position while marking and fastening the brace. |
The joint remains aligned and stable before the brace is attached. |
| 10 |
Eye protection |
Wear safety glasses when drilling or driving fasteners, and follow the tool’s safety instructions. |
The work area is clear, and the workpiece is supported securely. |
Note: Fastener type, pilot-hole size, and brace placement depend on the brace design, workpiece material, and intended load. Follow the product instructions and applicable safety guidance.
Position the Brace and Mark the Screw Holes
How to Install a Flat Corner Brace Properly?
Position the brace where both adjoining surfaces are flat and supported. Hold it firmly in the inside corner, with each arm aligned to the wood edges. Check that the joint sits square; a small gap can twist the brace when screws tighten. Use a pencil or awl to mark every screw hole through the brace. Remove it and inspect the marks. They should form a neat line, clear of cracked or damaged wood.
Accurate marks help keep screws centered and reduce the chance of splitting. The USDA Forest Products Laboratory’s Wood Handbook (2021) reports average shrinkage from green to oven-dry wood of about 8% tangentially and 4% radially. Wood movement varies by species and cut, so don’t assume two boards will stay perfectly still. If a mark falls close to an edge, reposition the brace slightly while keeping the joint supported. I sometimes find the first pencil marks look right, then spot a crooked line on a second check. That pause is worth it.
Tips: Clamp the brace before marking. Use a square to check alignment, and make light marks you can see without gouging the surface. If the wood is dense or prone to splitting, drill pilot holes sized for the screw.
How to Install a Flat Corner Brace Properly?
Position the brace, check its alignment, and mark each screw hole before drilling.
Illustrative checklist for a four-hole brace: check the position and alignment, mark all four holes, then recheck each mark. Brace designs vary, so use the actual hole layout as your guide.
Drill Pilot Holes and Secure the Brace
Mark the brace’s screw holes on the corner, then check that both pieces sit flush. Use a drill bit sized to the screw’s core, not its outer threads. Pilot holes help guide screws and reduce splitting, especially near board ends. Keep the drill square to the surface. A crooked hole can pull the brace out of alignment.
The USDA Forest Products Laboratory’s Wood Handbook (FPL-GTR-282, 2021) explains that screw-withdrawal strength depends on wood specific gravity, screw diameter, and threaded penetration. In practice, choose screws long enough to engage sound wood without emerging from the far side. Drill each pilot hole to the depth of the screw’s threaded section; a small piece of tape on the bit makes a useful depth marker. Don’t assume every wood species behaves alike.
Hold the brace firmly in place and drive screws gradually, alternating between holes to keep the metal flat. Stop when each head is seated; overtightening can strip the wood or distort a thin brace. Check the corner again by hand. If the brace rocks, loosen the screws and inspect for sawdust, a proud edge, or a misplaced pilot hole. That extra check may feel fussy, but it catches problems early.
Check Alignment and Test the Joint’s Stability
Set the flat corner brace against clean, dry surfaces, then align its edges with the corner before driving any fasteners. Check that the brace sits flush; a small gap can let the joint shift under load. A hairline gap matters. Mark each hole, and confirm the fasteners will enter sound material rather than a split, knot, or board edge. Tighten them evenly, stopping when the brace is snug. Overtightening can crush wood fibers and weaken the connection.
Check alignment again from above and from the side. The corner should remain square, with no rocking when you press each adjoining member. The USDA Forest Products Laboratory’s Wood Handbook reports reference wood-property values at 12% moisture content and places fiber saturation near 30%; changing moisture can affect wood dimensions and fit. If the wood is damp or recently moved indoors, allow it to stabilize before judging the joint. The American Wood Council’s 2024 National Design Specification also bases fastener design on factors such as wood species, fastener size, and penetration, so a brace’s appearance alone cannot confirm capacity. Apply firm hand pressure in several directions, watching for movement, widening gaps, or creaking. Recheck the fasteners after the test. If the joint still flexes, pause and review the substrate and fastening layout; I would not treat “feels tight” as proof of a reliable connection.