Leave Your Message

Why Choose a Strut Hinge for Your Application?

A Strut Hinge can look like a minor component, until a heavy lid drops or an access panel refuses to stay open. Small parts matter. In equipment enclosures, storage boxes, service doors, and vehicle compartments, the hinge helps control movement and support safer, more convenient access. Its performance depends on more than appearance: load capacity, opening angle, mounting space, material, and duty cycle all shape the right choice.

The stakes extend beyond the hinge itself. Siemens’ 2024 True Cost of Downtime report estimates that downtime costs the world’s 500 largest companies about 11% of their annual revenues. That figure is not specific to hinges, but it highlights why dependable components and maintainable designs deserve attention. The U.S. Department of Energy’s Operations & Maintenance Best Practices guide likewise emphasizes planned maintenance as a way to improve equipment reliability. A well-matched Strut Hinge may help reduce uncontrolled movement and simplify repeated access, though it cannot compensate for poor installation or incorrect sizing.

This guide examines where strut hinges fit, what to check before selection, and how to assess materials, force, and mounting conditions. A practical detail often gets missed: the lid’s weight is only part of the calculation; its center of gravity also affects the required support. There is no universal choice. Real installations can reveal surprises, so verify specifications and test the hinge under the actual operating conditions.
Why Choose a Strut Hinge for Your Application?

Strut Hinge Fundamentals: Pivot Design, Mounting Pattern, and Load Path

Why Choose a Strut Hinge for Your Application?

Strut Hinge Fundamentals: Pivot Design, Mounting Pattern, and Load Path

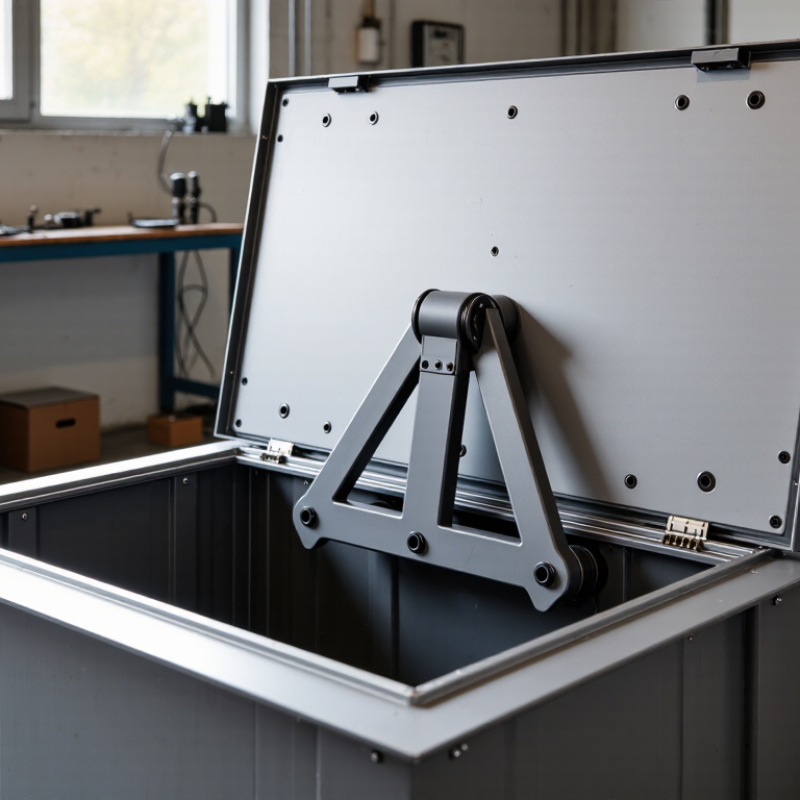
A strut hinge supports a lid or panel while guiding its rotation around a defined pivot. Its geometry determines where the strut pushes and how that force reaches the frame. On a storage chest, the lid-mounted and frame-mounted brackets must align through the opening arc. A few millimeters of offset can change leverage or make the strut bind. Small detail. It matters.

The mounting pattern should suit the structure, not just the hinge holes. Check screw spacing, edge distance, material thickness, and reinforcement behind the panel. Thin sheet metal may need a backing plate; wood can split if fasteners sit too close to an edge. Trace the hinge and strut through their full travel before drilling. The load path runs from the panel, through the pivot and brackets, into the supporting frame. If any link flexes, the assembly may sag or loosen over repeated cycles. Performance also depends on strut force, panel weight, and installation angle, so confirm specifications and test a representative setup.

Tips: Support the panel during installation, then move it slowly through its full range. Watch for rubbing, uneven gaps, or bracket movement. Recheck fasteners after initial use. This may feel overly cautious, but a quick inspection can reveal a layout mistake before it causes wear.
Compare Rated Loads in N, Opening Torque in N·m, and Safety Factors

Why Choose a Strut Hinge for Your Application?

Compare Rated Loads in N, Opening Torque in N·m, and Safety Factors

A strut hinge should be selected against the real load path, not just the lid’s weight. Convert mass to force using standard gravity: NIST Special Publication 811 gives 9.80665 m/s². A 12 kg lid therefore weighs about 118 N, before impacts or other operating forces. Check whether the rating applies per hinge or to the complete hinge set. That detail changes the calculation.

Opening torque depends on the force and its perpendicular distance from the pivot. If the lid’s center of gravity sits 0.25 m from the hinge axis, its static torque is about 29.5 N·m. Compare that demand with the hinge’s torque across the full opening path, not at one angle alone. Geometry, friction, and a shifting center of gravity can change the feel. Small details matter.

A safety factor compares capacity with expected demand, but its basis must be clear. ASME BTH-1 sets design criteria for below-the-hook lifting devices; its categories and factors should not be copied directly to cabinet hinges. Ask for documented load ratings, test conditions, cycle data, and mounting requirements. Include fasteners and the supporting panel in the check. A strong hinge on a weak panel is still a weak assembly. I would also question any rating that omits how the load was applied.

Match Hinge Geometry to Gas-Strut Force in N and Stroke in mm

Why Choose a Strut Hinge for Your Application?

Match hinge geometry to gas-strut force in N and stroke in mm. A strut hinge’s pivot location sets the lever arm, so force alone cannot predict how easily a lid will move. For a simple static estimate, divide the lid’s turning moment by the strut’s perpendicular moment arm and the number of struts. For example, a 10 kg lid with its center of mass 300 mm from the hinge creates about 29.4 N·m of torque. Two struts acting at a 200 mm effective arm need roughly 74 N each, before friction and safety allowances. Geometry changes the answer.

Check the full motion, not just the closed position. Measure the strut’s extended and compressed lengths, then compare their difference with the required travel in mm. Confirm that neither end reaches its stop before the hinge completes its movement. ISO 11901 provides a standardized framework for gas-spring testing, so compare force ratings under matching test conditions. Temperature matters, too: under the ideal gas law, a sealed gas volume warmed from 20°C to 30°C would rise about 3.4% in pressure. Real hardware may differ.

Small shifts matter. A mounting point moved only a few millimeters can alter leverage and peak force near closure. I still see designs chosen by force rating alone; it is a tempting shortcut, but an incomplete one. Sketch the hinge path, record mounting coordinates, and check force at several opening angles. Then prototype the motion with the actual panel weight. A neat calculation can miss seal friction, tolerances, or a slightly misplaced bracket.

Specify Corrosion Testing by ISO 9227 and Salt-Spray Duration

A strut hinge handles repeated movement while its finish faces moisture, road salts, or cleaning chemicals. Corrosion testing helps compare finishes before specifying a hinge. For a clear requirement, name ISO 9227 and the test method: neutral salt spray (NSS), acetic acid salt spray (AASS), or copper-accelerated acetic acid salt spray (CASS). These methods are not interchangeable. Select one suited to the coating and expected exposure, with input from a qualified testing laboratory.

Tips: State the test duration in hours, but do not treat it as a service-life guarantee. ISO 9227 describes test methods; it does not set one universal duration for every hinge. Define acceptance criteria, such as limits for red rust or blistering, and check whether the hinge still moves freely afterward. Test a complete hinge when practical, including cut edges, pivots, and fasteners. Salt spray is useful. Field conditions differ.

A 240-hour result means the sample met the agreed criteria after that test period. It does not prove years of outdoor service. Request the test report, coating details, specimen preparation, and inspection method. Small omissions matter. A hinge may look intact yet bind under load. Choose a duration that supports a documented comparison, then validate performance in the intended environment.

Why Choose a Strut Hinge for Your Application? - Specify Corrosion Testing by ISO 9227 and Salt-Spray Duration

Application environment Strut-hinge material or finish to consider Relevant ISO 9227 test setup Example duration checkpoint What to specify and assess
Dry indoor or low-corrosion setting Coated carbon steel may be considered where the coating and edges are suitable for the exposure. Neutral salt spray (NSS), ISO 9227. NSS uses a sodium chloride solution and a controlled chamber environment. 24 hours as an initial screening checkpoint; set the required duration in the product specification. Define whether evaluation covers red rust, coating damage, or functional operation after exposure.
Occasional humidity or condensation Select a corrosion-protective finish appropriate to the base metal, formed edges, fasteners, and assembly. NSS, ISO 9227; test representative finished parts or assemblies as agreed between supplier and purchaser. 96 hours as an example checkpoint, not an ISO-defined performance grade. Record exposed area, visible corrosion, coating blisters or defects, and any change in hinge movement.
Outdoor use with intermittent wetting Compare coated steel with corrosion-resistant stainless-steel options, considering the full hinge assembly and contact between dissimilar metals. NSS, ISO 9227, if specified for the coating or component comparison. Salt spray alone does not reproduce every outdoor exposure condition. 240 hours as an example checkpoint for a purchaser-defined test plan. State acceptance limits and whether testing includes cut edges, mounting hardware, and post-test function.
Coastal or salt-contaminated environment Assess corrosion-resistant materials and protective systems against the actual exposure, maintenance plan, and required service conditions. NSS, ISO 9227, where appropriate to the specified coating or component test; supplement with application-specific evaluation when needed. 480 hours as an example checkpoint only; establish the actual duration and criteria by agreement. Specify corrosion limits, inspection intervals, sample condition, and functional requirements after exposure.

ISO 9227 defines salt-spray test methods; it does not set a universal exposure duration, pass/fail limit, or direct conversion from chamber hours to service life. Agree the test duration, specimen preparation, evaluation method, and acceptance criteria in the applicable specification.

Verify Durability with Cycle Counts and Applicable EN 1935 Classes

Cycle count turns “durable” into a testable claim. For a strut hinge, count one full opening and closing as one cycle, then compare the rated life with expected daily use. At 20 cycles per day, 200,000 cycles represent about 27 years on paper. Real installations are messier. Side loads, dust, misalignment, and slamming can shorten service life, even when the test result looks strong.

EN 1935:2002 provides durability classes for single-axis building hinges. Its classification assigns Grade 4 to 25,000 cycles and Grade 7 to 200,000 cycles. These figures come from the standard’s test framework, not a guarantee for every strut hinge or mounting arrangement. Check that the product is within the standard’s scope before treating an EN 1935 class as relevant. Ask for the exact class, test evidence, and stated test conditions. Then inspect the hinge under realistic load, including the lid’s weight and how far it opens. A cycle figure without those details is incomplete. It is easy to overvalue a high number. The operating conditions matter just as much.

Why Choose a Strut Hinge for Your Application?

Verify durability with cycle counts and applicable EN 1935 classes.

EN 1935 durability grades correspond to specified test-cycle counts: Grade 3 is 10,000 cycles, Grade 4 is 25,000, Grade 7 is 200,000, and Grade 8 is 300,000. These figures describe standardized testing, not a guarantee of service life; confirm the hinge’s suitability for your application and operating conditions.